| |
Image |
Location |
Items Needed |
Description |
|
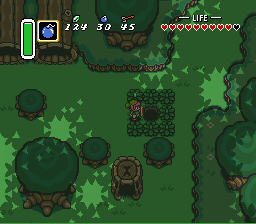
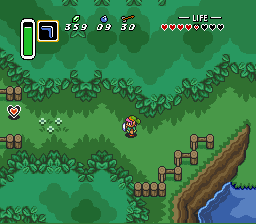
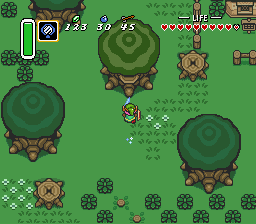
| The Lost Woods |
None |
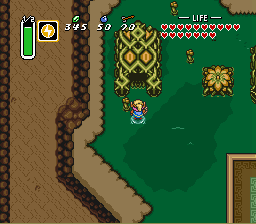
Find the 3×3 arrangement of bushes in the middle of the woods. Remove the center bush to reveal a hole in the ground. The hole is a back entrance to the thieves' den, where a heart can be located. |
|
 |
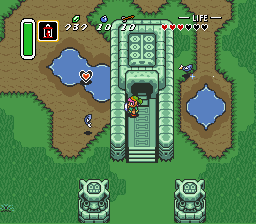
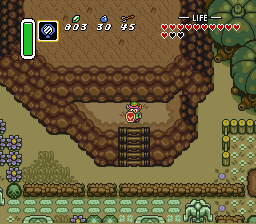
Kakariko Village |
Bombs |
Jump down into the well in the upper left corner of the village. Inside, you will find some bombs. Use the bombs to create a hole in the north wall. |
|
 |
Kakariko Village |
Bombs |
Enter the lower level of the thieves' hideout (with four treasure chests). Bomb the crack in the north wall and enter through the hole. |
|
 |
Kakariko Village |
Bombs |
Bomb the wall between the two Quarreling Brothers in the south of the village. Exit through the left brother's room and play the 15-second game. To shave time off the clock, jump over the fence in the middle of the course. |
|
 |
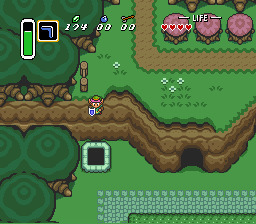
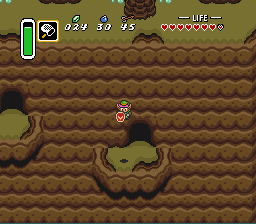
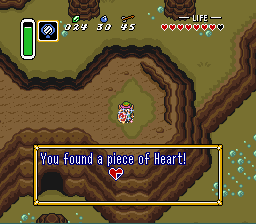
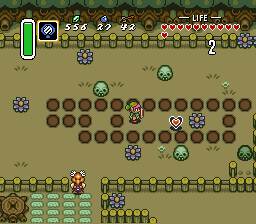
The Great Swamp |
None |
Enter the Swamp Ruins Watergate. Push the blocks aside so that you can enter the back room, and pull the right switch. Return outside to find a Heart Piece in the mud. |
|
 |
Near the Sanctuary |
Pegasus Boots |
Find the stack of rocks to the left of the Sanctuary. Use the Pegasus Boots to dash into the stack and knock them over, revealing a stairwell into the ground. |
|
 |
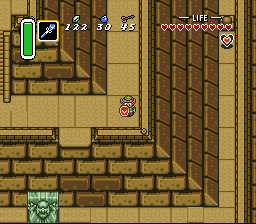
Desert Sanctuary |
Bombs |
Enter the cave to the right of the Desert Palace. Bomb the south wall of the room where the old man waits, and enter the room below. |
|
 |
Desert Palace |
Book of Mudora |
When you exit the first portion of the Desert Palace, before you lift up the rocks to enter the second part, run along the left cliff ledge to find a heart piece to the south. |
|
 |
Zora's Falls |
Zora's Flippers |
After purchasing the Flippers from Zora, travel to the south, and drop down the small waterfall. Then hug the wall to the left until you can climb up and walk on dry land. A heart piece lies to the west. |
|
 |
Death Mountain |
Power Glove |
When you reach Spectacle Rock, jump down the side of cliff, just left of Spectacle Rock's center. Enter the cave there, and climb the stairs to find a heart piece. |
|
 |
Death Mountain |
Magic Mirror |
When you teleport to the Dark World for the very first time, you will be transformed into a bunny. Around the location of Spectacle Rock, you will see two creatures interacting. Activate the Magic Mirror when you are standing where Spectacle Rock should be. When you return to the Light World, you will be standing on Spectacle Rock, and you can collect the heart piece. |
|
 |
Pyramid of Power |
None |
Immediately after you fight Agahnim, and he sends you to the Dark World, you will arrive on top of the Pyramid of Power. Explore the right side of the Pyramid and you will find a heart piece. |
|
 |
Outside the Lost Woods |
Pegasus Boots |
After Agahnim banishes you to the Dark World, the Lumberjack Brothers pack up and leave the tree they were working on behind. One solid Dash Bash will knock the trunk off of the stump, revealing a stairwell to the ground below. |
|
 |
Ice Lake |
Flippers, Magic Mirror |
After you arrive in the Dark World, jump off of the dock to the right of the bridge south of the Dark Palace. Swim over to the configuration of rocks and use the Magic Mirror in the center to reach a closed off Island in Lake Hylia. |
|
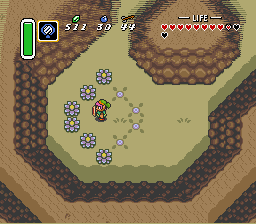 |
South of Haunted Grove |
Magic Mirror |
To the south of the Haunted Grove in the Dark World is this oval configuration of plants. Step inside and use the Magic Mirror to be transported to the Light World. You will arrive on a cliff in front of the mouth of a cave. |
|
 |
Ghostly Garden |
Magic Mirror |
North of the Ghostly Garden in the Dark World is a ladder that leads to a small ledge that goes nowhere. Stand on that ledge and activate the Magic Mirror to be transported to the top of an unreachable ledge above the Hyrulean Cemetery with a cave entrance. In the cave, make your way through the pots and bomb the other side of the narrow cave open. Through there, you'll find another Heart Piece. |
|
 |
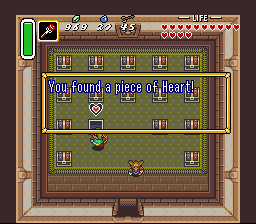
Treasure Field |
None |
You must pay 80 Rupees for the chance to dig throughout a man's treasure field for 30 seconds. Every time you enter, all of the items that the field contains, including a single Piece of Heart, are randomly distributed. To improve your chances of finding the piece, dig as many holes as you can within the time limit. |
|
 |
Game of Chance |
None |
In the Village of Outcasts, one man offers you the chance to open two treasure chests for a small price. The contents are distributed randomly every time you play. To improve your chances of finding the one Heart Piece, open the same two treasure chests every time that you play until you find it. |
|
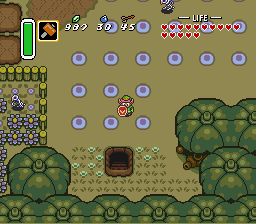 |
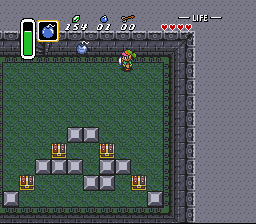
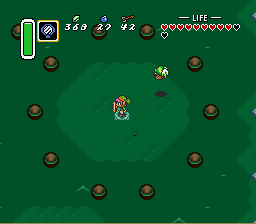
Stake Field |
Titan's Mitt, Magic Hammer |
Once you can gain access to the field of stakes in front of the shattered house in the Dark World, proceed to hit every stake into the ground with your hammer. A stairwell will be revealed. |
|
 |
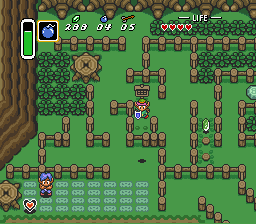
Outside Skull Woods |
Power Glove, Hookshot, Magic Cape |
In the Light World, one cave serves as the entrance to Death Mountain. In the Dark World, that cave merely doubles back to the exit above that cave where a Heart Piece waits. But in order to reach it, you'll need the aid of the Magic Cape, which turns you invisible, and allows you to pass through the large bumper that repels any visible intruder. |
|
 |
Misery Mire |
Flute, Titan's Mitt |
Call upon the flute boy's duck to transport you to the high ledge in the desert of mystery, and walk onto the Warp Tile to be transported to Misery Mire. Walk through the marsh to the left cave entrance beside the entrance to Misery Maze. |
|
 |
Misery Mire |
Flute, Titan's Mitt, Magic Mirror |
Walk into the small alcove formed by the cliff wall in the upper right corner of the marsh. Use the Magic Mirror to be teleported to a high ridge in the Desert of Mystery, and lift the rock there to reveal a stairwell. |
|
 |
Death Mountain |
Power Glove, Magic Mirror |
Towards the top of Eastern Death Mountain in the Dark World, a rock lies just outside of a cave. Lift the rock to reveal a stairwell. Inside, there are a series of islands that you can grapple to but there is an invisible pathway that is not quite straight off from the main entrance. Bomb the wall opposite from the entrance, then bomb the left wall in the room beyond. Enter the left hole and exit through the south to reach an isolated peak on the mountain top. Use the Magic Mirror to be teleported to the same peak in the Light World where a Piece of Heart lies. |
|
 |
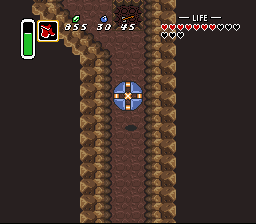
Turtle Rock |
Magic Mirror |
Roughly half way through your progress in the Turtle Rock dungeon, you will encounter a brief reprieve from the inside, and cross a ledge on the outside of Death Mountain. Stand in the rightmost end of the ledge and use the Magic Mirror to reach an otherwise unreachable balcony in the Light World. Enter the cave, and you must defeat four Green Goriyas to open the door above where the Heart Piece waits. Two are easy to attack, but the other two are most easily dispatched with arrows. |